
Analytics & Tracking
Connect your own Google Analytics 4 (GA4) and Meta Pixel to a page so its traffic flows straight into your own analytics and ad accounts. You can also tag individual buttons so specific clicks show up as events. Everything runs in your visitor's browser and only fires after they accept cookies.
Analytics & Tracking is available on the Professional plan and is set per page. On the free plan you will see an upgrade prompt instead of the fields. See Plans & Billing.
Connect your trackers
Open the page you want to measure, then go to SettingsAnalytics & Tracking.
Get your GA4 Measurement ID
In Google Analytics, go to Admin > Data Streams, open your web stream, and copy the Measurement ID. It looks like G-XXXXXXXXXX.
Get your Meta Pixel ID
In Meta Events Manager, go to Data Sources and copy your pixel's ID. It is a 15 to 16 digit number, e.g. 123456789012345.
Paste and save
Paste either or both IDs into the matching fields and press Save Changes. You can connect just one, or both. Leaving a field empty means that tracker is not loaded.
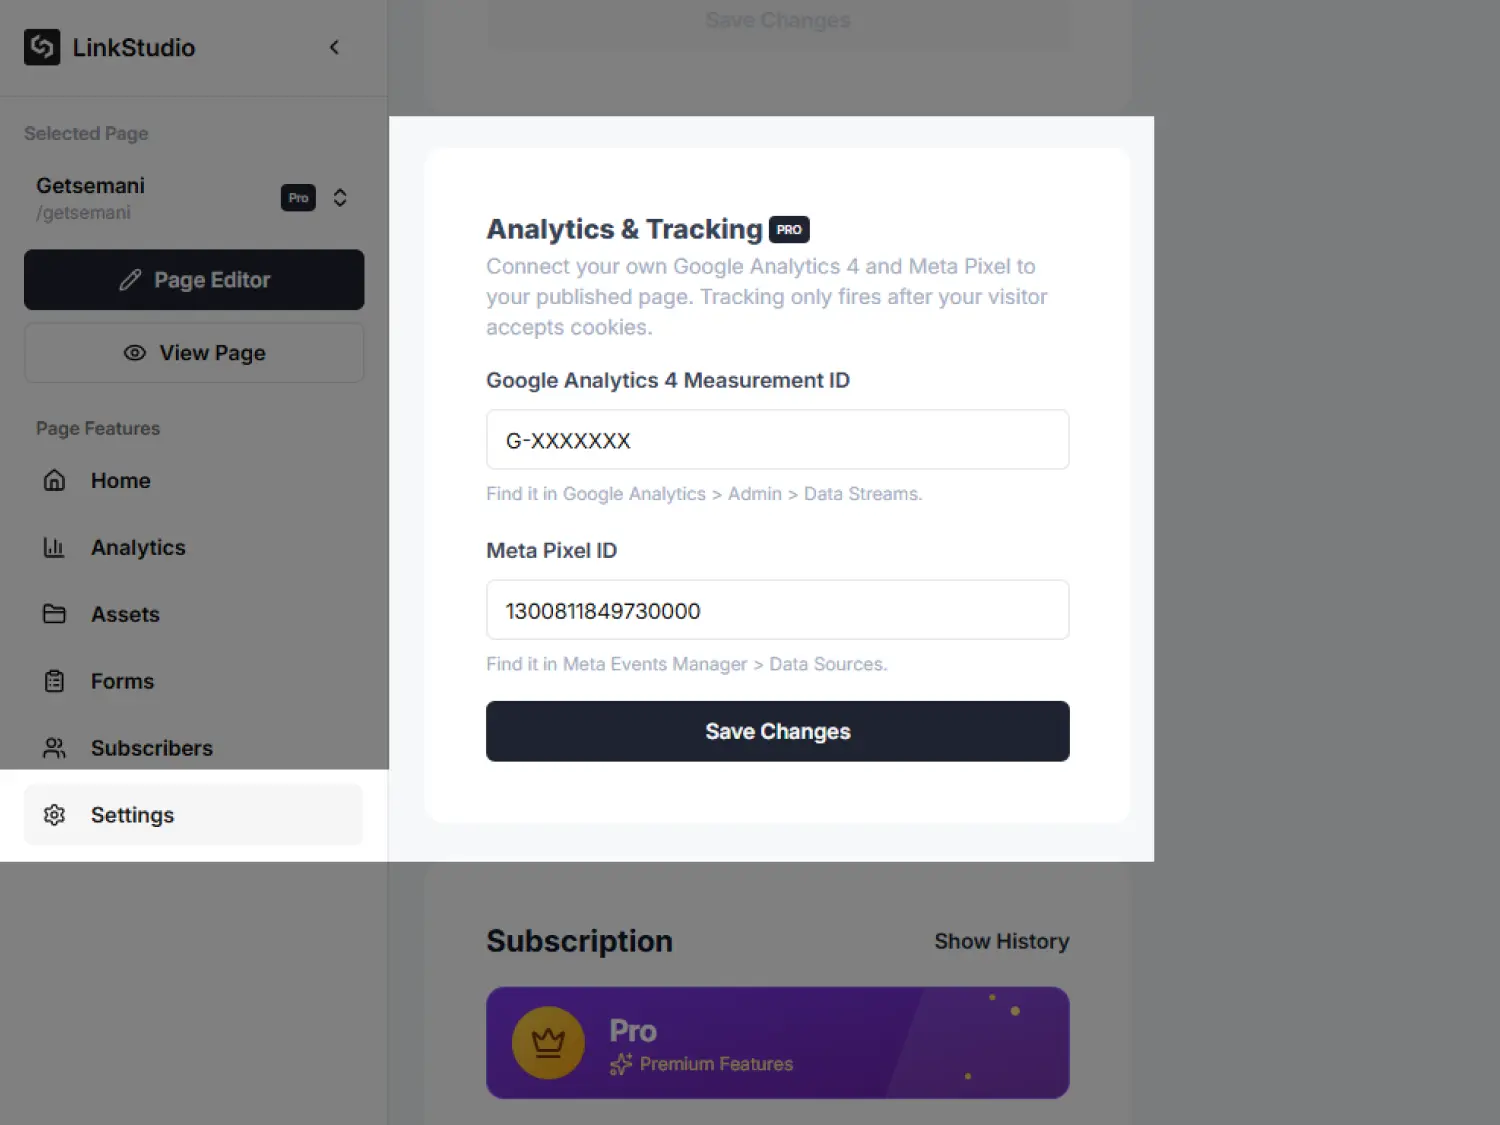
G-XXXXXXXXXX). Loads GA4 on the live page and reports page views automatically.PageView on the live page.Trackers point at your GA4 property and your Meta Pixel only. Link Studio's own analytics are never mixed in with yours.
How cookie consent gates tracking
Nothing tracks a visitor until they allow it. Every published page shows a cookie notice, and a Cookie Preferences link stays in the footer so visitors can change or withdraw their choice at any time.
Visitors from regions that require opt-in (such as the EU and UK) see a blocking consent modal, and nothing fires until they accept. Elsewhere, tracking is on by default and the Cookie Preferences link lets visitors opt out. A visitor's explicit choice is always remembered on their browser.
A category only appears in the notice when you have actually connected the matching tracker. If you connect neither, the Cookie Preferences link still shows, but it opens an information-only notice rather than a consent toggle.
Track individual button clicks
Beyond page views, every enabled Click Event sends a click to your trackers. This works on any element that has a Click Event: a Button, an Icon Button, or a Container.
Enable the click event
Select the element, open Click Event in the Fields panel, and turn on Enable Click Event. Pick any type (Link, Subscription, and so on).
Name the button (optional)
Fill in the Analytics event name field, e.g. signup_button or buy_now. This label identifies the button in your reports. Leave it empty and the destination URL is used instead.
The name can be anything, spaces included, it is sent as a label, not a code identifier. What matters is being consistent and unique: Buy Now, buy now, and buy_now count as three separate buttons in your reports. Pick one style (readable like Buy Now or a slug like buy_now) and reuse it, and give each button a distinct name so you can tell them apart.
When a visitor taps that button on the live page, Link Studio sends:
click event (same as Enhanced Measurement outbound clicks) with link_id (the name you entered, or the destination URL), link_url, link_domain, link_text, and outbound: true.LinkClick with content_name (same label) and content_category (link, subscription, and so on).Using one fixed event with a label parameter (rather than a new event name per button) keeps your GA4 event list tidy and lets you group and compare buttons in reports. Click events respect the same consent as page views: click only fires when performance is allowed, LinkClick only when advertising is allowed.
In GA4, open Reports → Engagement → Events → click, or Explorations and add the built-in Link ID / Link URL dimensions. No custom dimensions to register. In Meta Events Manager, open the LinkClick event; after a few live hits, Parameters lists content_name and content_category. You can also filter custom conversions and audiences on content_name.
Trackers and click events never run inside the editor. Publish the page, accept cookies, then use the GA4 Realtime report and the Meta Pixel Helper extension to confirm events are arriving.